 When the kids call for an arts and crafts activity on the fly, an easy one to whip up is an afternoon spent at home getting creative with salt dough. Salt dough is an exciting activity that can be done all year round. It’s easy, fun, and sparks creativity in kids of all ages.
Swiss School teacher Linda Ninio along with JG1 student Wenxin Li, Grade 1 student Justin Springfeld, and Grade 2 student Jana Pesch show us their salt dough creations in our March/April issue’s Maker’s Corner.
What You’ll Need
- 2 cups of flour
- 1 cup of water
- 1 cup of salt (optional: a little bit of some oil)
- Food coloring
- Rolling pin
- Cookie cutters
- Parchment paper
- Toothpick
- Thread and scissors
Instructions
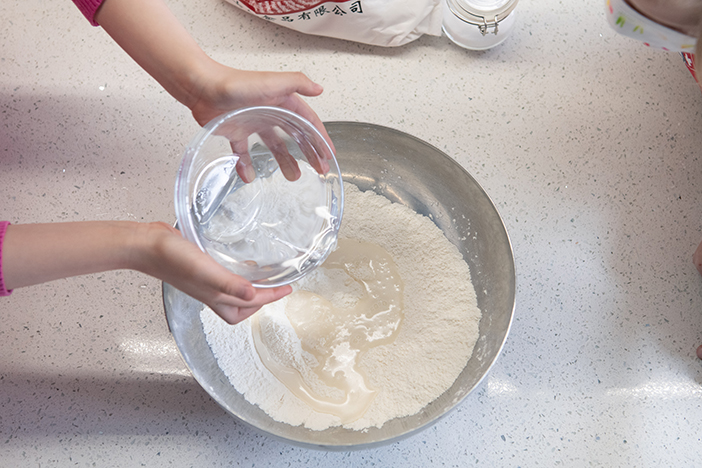
 1. Mix the dry ingredients in a bowl then add the wet ingredients. Knead until the dough is soft and easy to shape.
 2. Optional: If you want colored dough, add a few drops of food coloring. For a unicolor dough, knead thoroughly; for marble-like dough, knead just a little.
 3. Get creative! The salt dough can be used to knead and cut all possible shapes and figures! Shape with your bare hands, make cut-outs with cookie cutters, use shells to create an imprint, add flowers or create animals.
 4. If you want to hang your artwork later, pierce a hole using a straw before baking/drying.
 5. The figures are baked at 125°C for about an hour. Before cooling down, check whether the dough has hardened.
Alternatively, the salt dough figures can also be air-dried. This takes about two days, but the figures will crack less. If you are using flowers or other fresh materials to decorate, we recommend air drying.
 6. Once the figures are cold and dry, they can be painted with water-based paint or with felt-tip pens (don’t press too hard!).

KEEP READING: We’re Recruiting Students for the Next Teen Takeover Issue!
Images: WAB Communications
 This article appeared in the jingkids 2021 March issue


