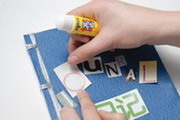
How To Make Your Own Journals And Notebooks
 Time:
Time:
30 minutes to an hour
Easy to medium
Materials:
Glue stick
Preparing The Pages
1. Fold each piece of office paper in half. If you are recycling scratch paper, make sure the printed side of the paper is folded inside and the blank side is visible.
2. Run a ruler over each fold to make your crease flatter. Pile your pages together, lining up the edges with the folds on the right side.
3. Fold a piece of cardstock in half, and tear at the fold.
4. Use these two pieces to make the front and back cover.
Making The Holes
 1. Using a ruler and a pencil, draw a line down the long (unfolded) side of your paper measuring 2cm from the edge.
2. To make a book with a four-hole binding, mark the paper 2cm from the bottom of your pencil line and another one 2cm from the top of the line; 
this is
where your first two
3. Evenly space the remaining holes along the middle of your journalís left side and mark the paper accordingly. (You can do this by measuring the distance between these two marks and dividing that number by three – this will be the distance between the two remaining holes.)
4: Using a one-hole punch, make holes along the vertical line. After you punch one piece of paper, use it as a stencil to mark your other pages so that the holes of all the pages will line up at the same points.
Making the binding
1. Thread a meter of
ribbon onto the tapestry needle and tie a
knot at the end of your ribbon.
2: Opening up your book to a page in the middle, thread your ribbon from the inside of your book up through the third hole to the front cover. Make sure to keep a length of ribbon inside the book to tie the binding at the end.
3: Wrap the ribbon around the spine and thread it again through the third hole from the back of the book through the front.
4: Next, thread the ribbon through your second hole and repeat the same sequence of wrapping around the spine
and threading from front to back. Repeat this step again
with the top hole


