This is the third part of a three part series. The first featured how to make the easy crepe paper tassel garlands while the second featured how to make tree ornaments from flour dough.
Kids especially love the holidays – after all, school is out and there’s a steady influx of gifts and candy. Double up on the spirit of the season and get your little ones crafting their own decorations. Gradually making your own as a family builds their anticipation for the winter holidays, so skip the shops this year and try some DIY decor instead. These rustic projects are cheerful, colorful, and inexpensive, and we’re sure you’ll find making them is enjoyable for kids from 1 to 92.
Estimated time: 4 hours
Suitable for: Ages 5+ (adult supervision required)
Materials
• Strong cardboard
• Dinner plate
• Soup bowl
• Marker
• Scissors
• Plastic bags
• String
• Plastic wrap
• Paper (e.g. old paperbacks or colored printer paper)
• Strong crepe paper
• Glue gun and glue sticks
Directions for the Wreath Form
1. Trace the outline of the dinner plate on cardboard and cut out the shape. Place the soup bowl on top of this disk, align to center, trace, and cut out again.
2. Fold a plastic bag into a small rectangle. Secure to the cardboard ring on one side using plastic wrap. Continue adding plastic bags and plastic wrapping until the cardboard ring is covered.

3. Tie a length of string around the shape to hang the wreath later.

4. Cut some of the crepe paper into 2cm-wide strips. Bind these over the plastic wrap.
Directions for the Rolled Paper Roses
5. Tear a page out of one of the paperbacks, or cut a sheet of colored printer paper in half. Cut out the shape of a circle.
6. Cut out the shape of a spiral, thinner at the outside edge, and gradually becoming thicker as it gets closer to the center of the circle.
7. Roll the spiral tightly from the edge until you reach the center.

8. Hot glue the paper curl to the center.

Directions for the Crepe Paper Roses
9. Cut three squares of equal size. Fold each square diagonally, then in quarters, then into eighths.
10. Cut off the tip of each eighth, and cut a half circle shape on the wider ends. Unfold each shape.
11. Cut one petal out of the first shape, two from the second, and three from the third.

12. Take the shape with five petals, and glue the two ends together. Then curl the ends of each petal back on themselves. Repeat with each of the remaining shapes.
13. Hot glue the petal pieces inside each other, starting with the largest and ending with the single curled petal.

Directions for the Paper Cones
14. Take a sheet of paper and from the center of the sheet, roll the sides into a cone.
15. Hot glue the cone to secure.

Directions for Assembling the Wreath
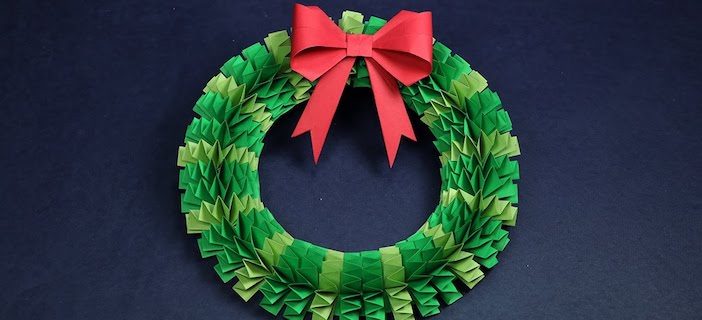
16. Hot glue the paper cones to the flat side of the wreath form.
17. Hot glue the crepe paper roses to the lowest point of the wreath when the wreath is hanging up.
18. Hot glue the rolled paper roses over the entire surface of the wreath form.
This article originally appeared on p52-53 in the December 2014 issue of beijingkids. To view it online for free, click here. To find out how you can obtain your own copy, email distribution@truerun.com.
Photos: Joey Guo


